Connecting Clerk and Database using Webhooks
Prabin Acharya

Introduction
When building modern web applications, user management is a key aspect, and Clerk provides a powerful, ready-made authentication system.
But what if you also have a custom database (for example, PostgreSQL, MongoDB, or MySQL) where you want to keep a record of your users?
That’s where webhooks come in.
With Clerk Webhooks, you can automatically sync user data from Clerk to your database whenever an event occurs (like user creation, update, or deletion). In this guide, we’ll walk through connecting Clerk to your backend via webhooks and testing it locally using ngrok![]() .
.
What You’ll Learn
- Why webhooks are essential when integrating Clerk with a custom database
- How to set up an Express.js backend for receiving webhook events
- How to register and verify a Clerk webhook endpoint
- How to expose your local development server using ngrok
- How to handle webhook payloads and update your database accordingly
Let’s dive in :)
Table of Contents
- Why This Blog Is Important
- Prerequisites
- Installing Required Packages
- Setting Up Clerk in the Backend
- Creating Webhook API Route
- Setting Up ngrok for Local Testing
- Connecting the Webhook and Adding Events
- Handling Webhook Payloads
- Conclusion
1. Why This Blog Is Important
When you use Clerk for authentication, all user data is securely managed by Clerk, but your app might still need to:
- Maintain a local user table for storing app-specific data (like roles, birthdates, relations etc)
- Automatically create or update users in your database when they register or update their Clerk profile
- Stay in sync even if users are deleted in Clerk
Webhooks act as messengers. Every time something happens in Clerk (like a user signs up), Clerk sends a payload to your backend.
Your backend can then update your database automatically, keeping everything in sync without manual intervention.
2. Prerequisites
- Frontend with clerk integration (in any techstack).
3. Installation and Required Packages
Let’s start by setting up a simple Express.js backend with clerk integration. You can skip this if you already have it.
Step 1: Initialize the Project
mkdir clerk-webhook-demo
cd clerk-webhook-demo
npm init -y
Step 2: Install Dependencies
npm install express dotenv @clerk/express Here’s what each package does:
- express → web server to handle routes
- dotenv → manages environment variables
- @clerk/express → clerk package for express
Step 3: Folder Structure
clerk-webhook-demo/
├── server.js
├── .env
├── package.json
└── node_modules/
Now let’s move on to Clerk setup.
4. Setting Up Clerk in the Backend
Before receiving events, you’ll need your Clerk API keys.
Step 1: Create an Application in Clerk Dashboard
- Visit https://dashboard.clerk.com
- Create a new application (if not already)
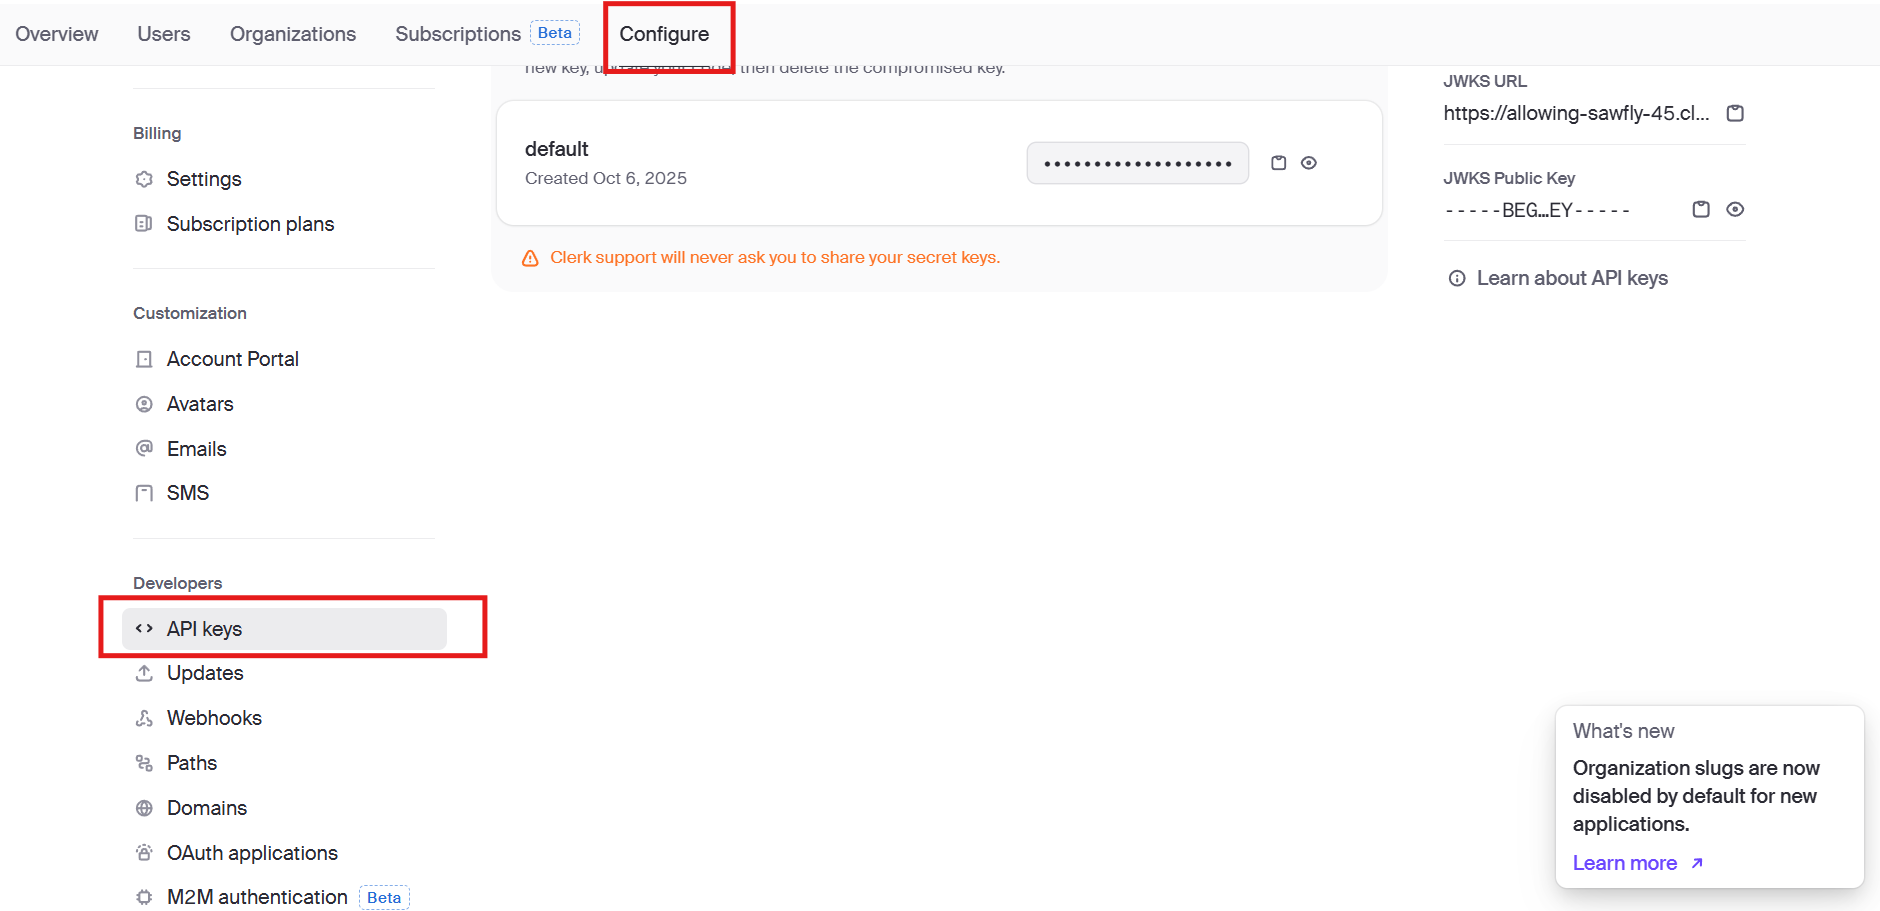
- Go to Configure tab and scroll down to find API keys section and copy:
- CLERK_SECRET_KEY
- CLERK_PUBLISHABLE_KEY

(Dont forget to choose yout tech in top right corner, i am using express for this demo.)
Step 2: Create .env File
CLERK_PUBLISHABLE_KEY=pk_test_*********************************
CLERK_SECRET_KEY=sk_test_*********************************
Step 3: Basic Server Setup (server.js)
import express from "express";
import { clerkMiddleware } from '@clerk/express';
import "dotenv/config";

const app = express();

app.use(express.json());
app.use(clerkMiddleware());

// Test route
app.get("/", (req, res) => {
  res.send("Clerk Webhook Demo Running!");
});

app.listen(3000, () => {
  console.log(`Server running on port 3000`);
});
*Note that our server is running on port 3000. Remember this port as we will use it later with ngrok. Now run your server with:
node --watch server.jsNow that the backend works, let’s create the webhook route.
5. Creating Webhook API Route
The webhook route is where Clerk will send user events like user.created or user.updated. Don't worry this is just your normal post api route just not used by our frontend but by clerk's server.
Step 1: Add a Route for Webhooks
// server.js
import express from "express";
import { clerkMiddleware } from '@clerk/express';
import { verifyWebhook } from "@clerk/express/webhooks"
import "dotenv/config";

const app = express();

app.use(express.json())
app.use(clerkMiddleware());

// Test route
app.get("/", (req, res) => {
  res.send("Clerk Webhook Demo Running!");
});

//Webhook route
app.post("/api/webhooks", express.raw({ type: 'application/json' }), async (req, res) => {
    try{
        const evt = await verifyWebhook(req);

        //event data is received in evt. It contains user data if user event like create or updated is triggered.
        //You can pretty much do anything with this data.
        console.log(evt.data);

        res.status(200).json({"message":"Webhook received"})
    }catch (error){
        console.log("Error occured while receiving webhook", error);
        res.status(500).json("message":"Something went wrong");
    }
})

app.listen(3000, () => {
  console.log(`Server running on port 3000`);
});
Important notes
- verifyWebhook is the function that checks and validate clerk signature using signing secret. It is a security measure.
- express.raw middleware is used to get unparsed incoming payload as buffer. It is done as incoming payload contains signature that needs to be verified.
- Once running, your local webhook endpoint will be available at: http://localhost:3000/api/webhooks
- What payload we receive depends upon which event are we subscribed to in clerk's webhook. We will cover this step after setting up ngrok.
- The schema of data received is available in here

Our server is running locally but clerk's server can’t reach your localhost — so we’ll fix that with ngrok. We will essentially create temporary deployment for out backend so that clerk's server can access it. This is not as complicated as it sounds, so just stick with me.
6. Setting Up ngrok for Local Testing
Clerk needs a public URL to send webhook events. ngrok creates a secure tunnel to your local server.
Step 1: Install ngrok
npm install -g ngrokStep 2: Start the Tunnel (using port 3000 as our server is running there.)
ngrok http 3000You’ll get an output like this:
Forwarding https://abcd1234.ngrok-free.dev -> http://localhost:3000Copy the https://abcd1234.ngrok-free.dev URL — we’ll use it in Clerk Dashboard.
Now our server is publicly availabe in internet in this url, so clerk can access it. Note that the webhook endpoint should be publicly available i.e. the route should not be protected.
7. Connecting the Webhook and Adding Events
Now that you have your public URL, let’s create a webhook in Clerk.
Step 1: Go to Clerk Dashboard → Configure → Webhooks
- Click Add Endpoint
- Paste your ngrok URL followed by the webhook route we created earlier:
bash https://abcd1234.ngrok-free.dev/api/webhooks - Choose Events to subscribe (e.g.):
user.createdthis event is fired when new user is created in clerkuser.updatedthis event is fired when a user's info is updated like name or imageuser.deletedthis event is fired when a user is deletedsession.createdthis event is fired everytime a user logs in
- Click Create
After creating, Clerk will show you a Webhook Secret Key — copy it and update .env:
WEBHOOK_SECRET=whsec_**********************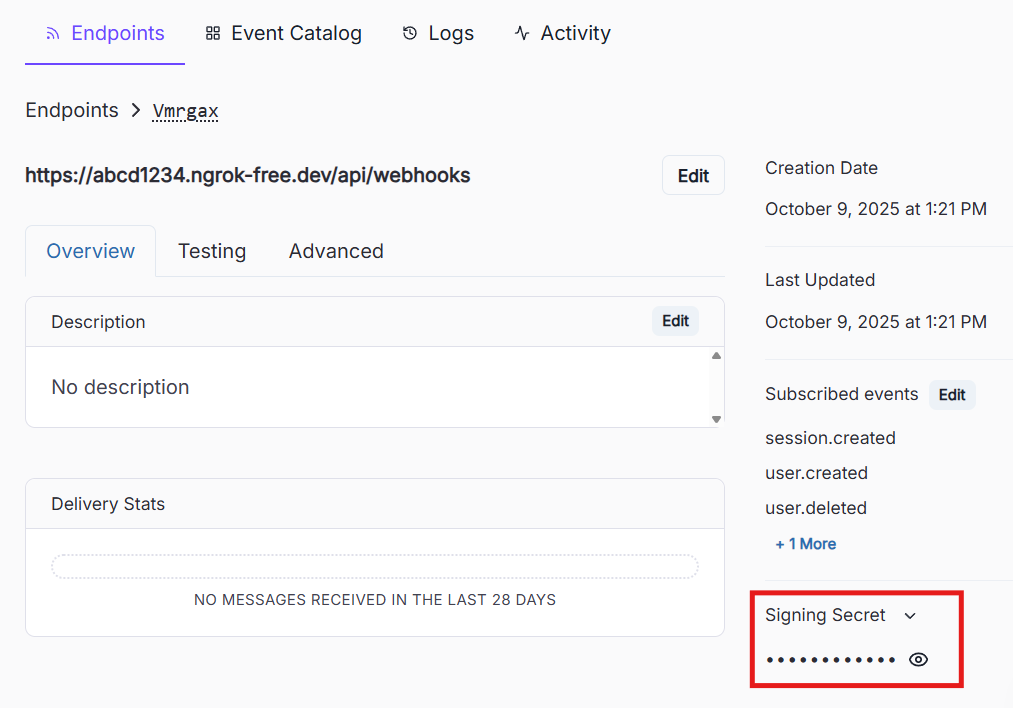
8. Handling Webhook Payloads
Now, let’s actually handle the events that Clerk sends.
We’ll check event types like user.created,user.updated, user.deleted and update our database accordingly. You can use any branching operation but i will use switch statement for evt.type.
Example Route with Event Handling
app.post("/api/webhooks/clerk", express.raw({ type: 'application/json' }), async (req, res) => {
  try {
    const evt = await verifyWebhook(req)

    switch (evt.type) {
      case "user.created":
        console.log("🟢 New user created:", evt.data.email_addresses[0].email_address);
        // TODO: Insert user into your DB
        break;

      case "user.updated":
        console.log("🟠 User updated:", evt.data.id);
        // TODO: Update user data in your DB
        break;

      case "user.deleted":
        console.log("🔴 User deleted:", evt.data.id);
        // TODO: Remove user from your DB
        break;

      default:
        console.log("Unhandled event:", evt.type);
    }

    res.status(200).json({ message: "Webhook processed successfully" });
  } catch (error) {
    console.error('Error verifying webhook:', err)
    return res.status(400).send('Error verifying webhook')
  }
});
💡 Pro Tip: If you’re using PostgreSQL, Prisma, or Mongoose, this is where you’d perform your
INSERT,UPDATE, orDELETEoperations to keep the data synced.
9. Conclusion
Congrats, you’ve successfully connected Clerk to your custom backend using webhooks!
Let’s recap what we achieved:
- Set up an Express.js server
- Created a Clerk webhook endpoint
- Exposed it to the internet using ngrok
- Connected Clerk’s events to the backend route
- Listened for
user.created,user.updated, anduser.deletedevents - Prepared to sync user data automatically with your database
You can now expand this setup by integrating your ORM (Prisma, Sequelize, or Mongoose) to persist user data, or deploy your webhook endpoint to production (e.g., Vercel, Render, or Railway).
And that’s it! You now have a seamless system where Clerk and your database stay in sync automatically